
Load Balancer Guide
The current version of the Load Balancer comes with the source code and an example that showcases the load balancing functionality in Unity. In order to run the basic example, you must install the corresponding executables and dependencies required for its operation. The source code can be used as a standalone solution to implement the custom load balancer. This guide will walk you through the installation process and running the basic Load Balancer example.
For more information about the Load Balancer, refer to the corresponding article explaining the load balancing mechanism.
Installation
- Clone the Load Balancer repository to your local environment:
https://github.com/gamecarrier/load-balancer
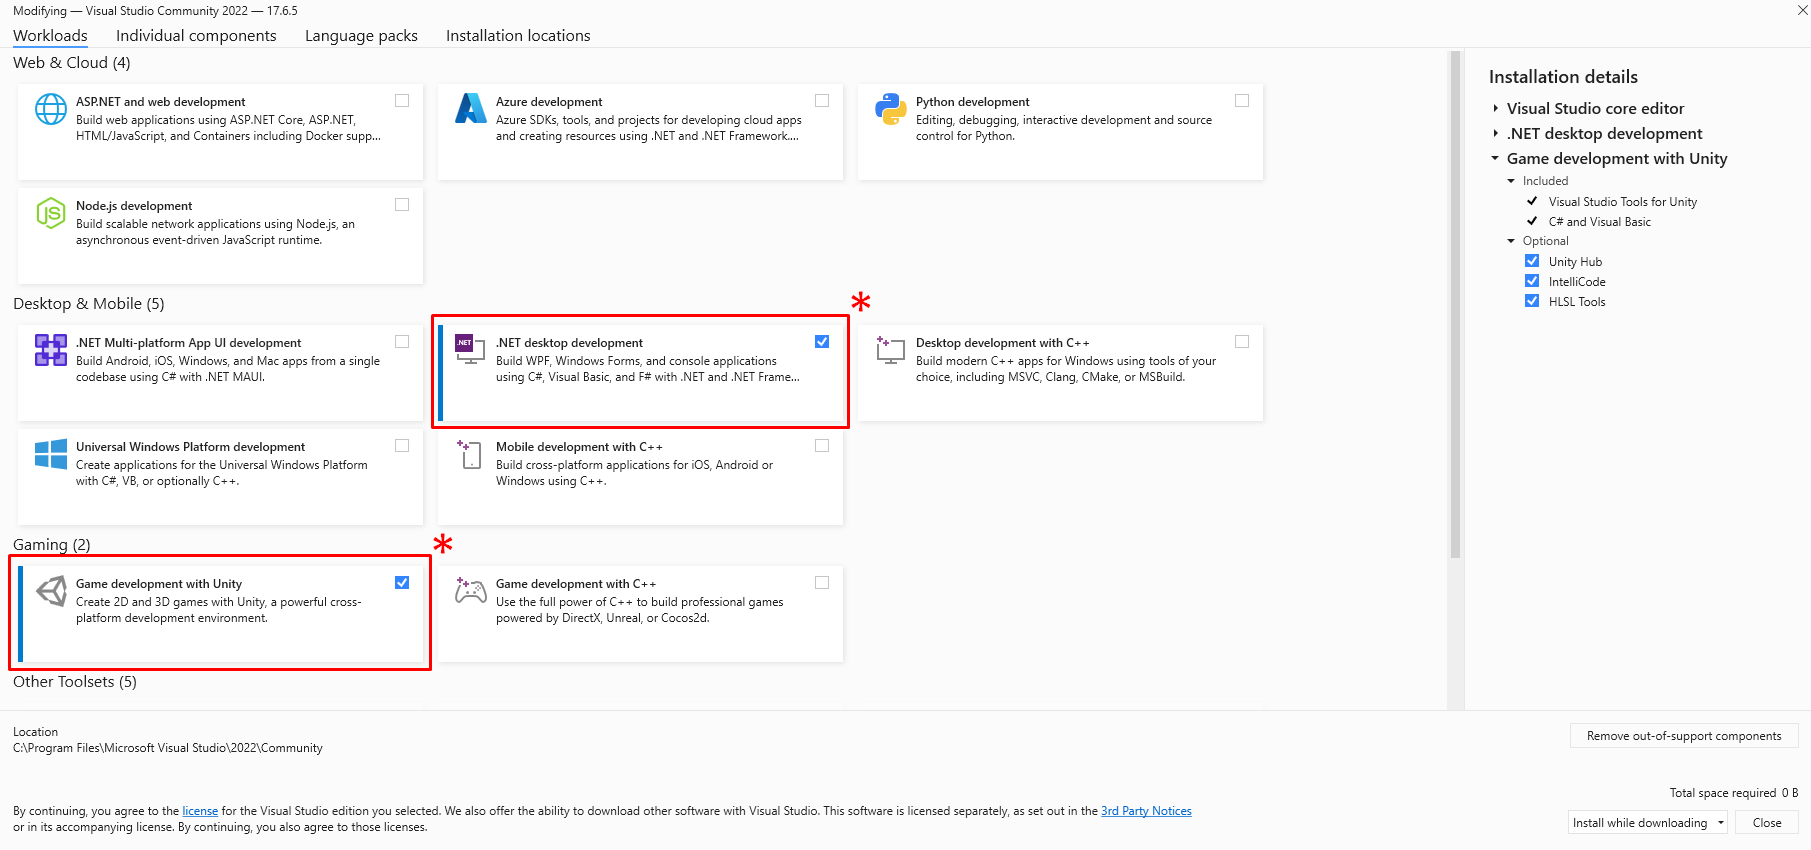
- Download and install Visual Studio 2022.
While installing the Visual Studio 2022, make sure to include two additional components:
- .NET desktop development
- Game development with Unity
-
Download and install .NET Runtime 6.0.
-
Download and install .NET SDK 6.0.
-
Sign up with the Game Carrier, log into your account, on the Download page in the dashboard select the appropriate platform and download the Transport Server and client binaries.
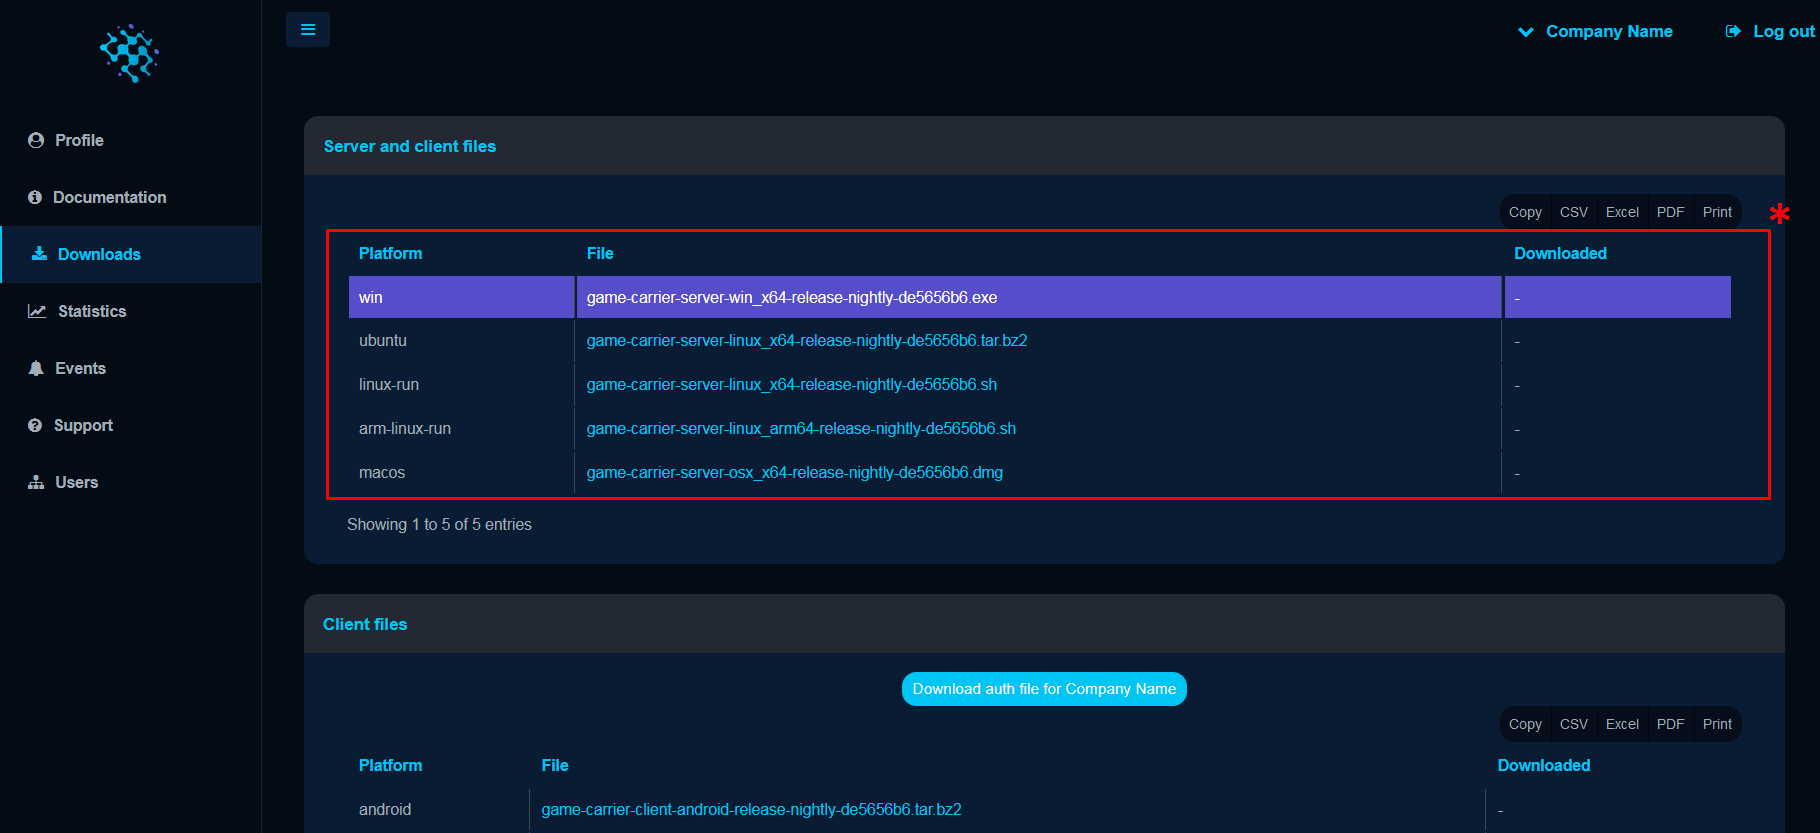
Run the installation after the download.
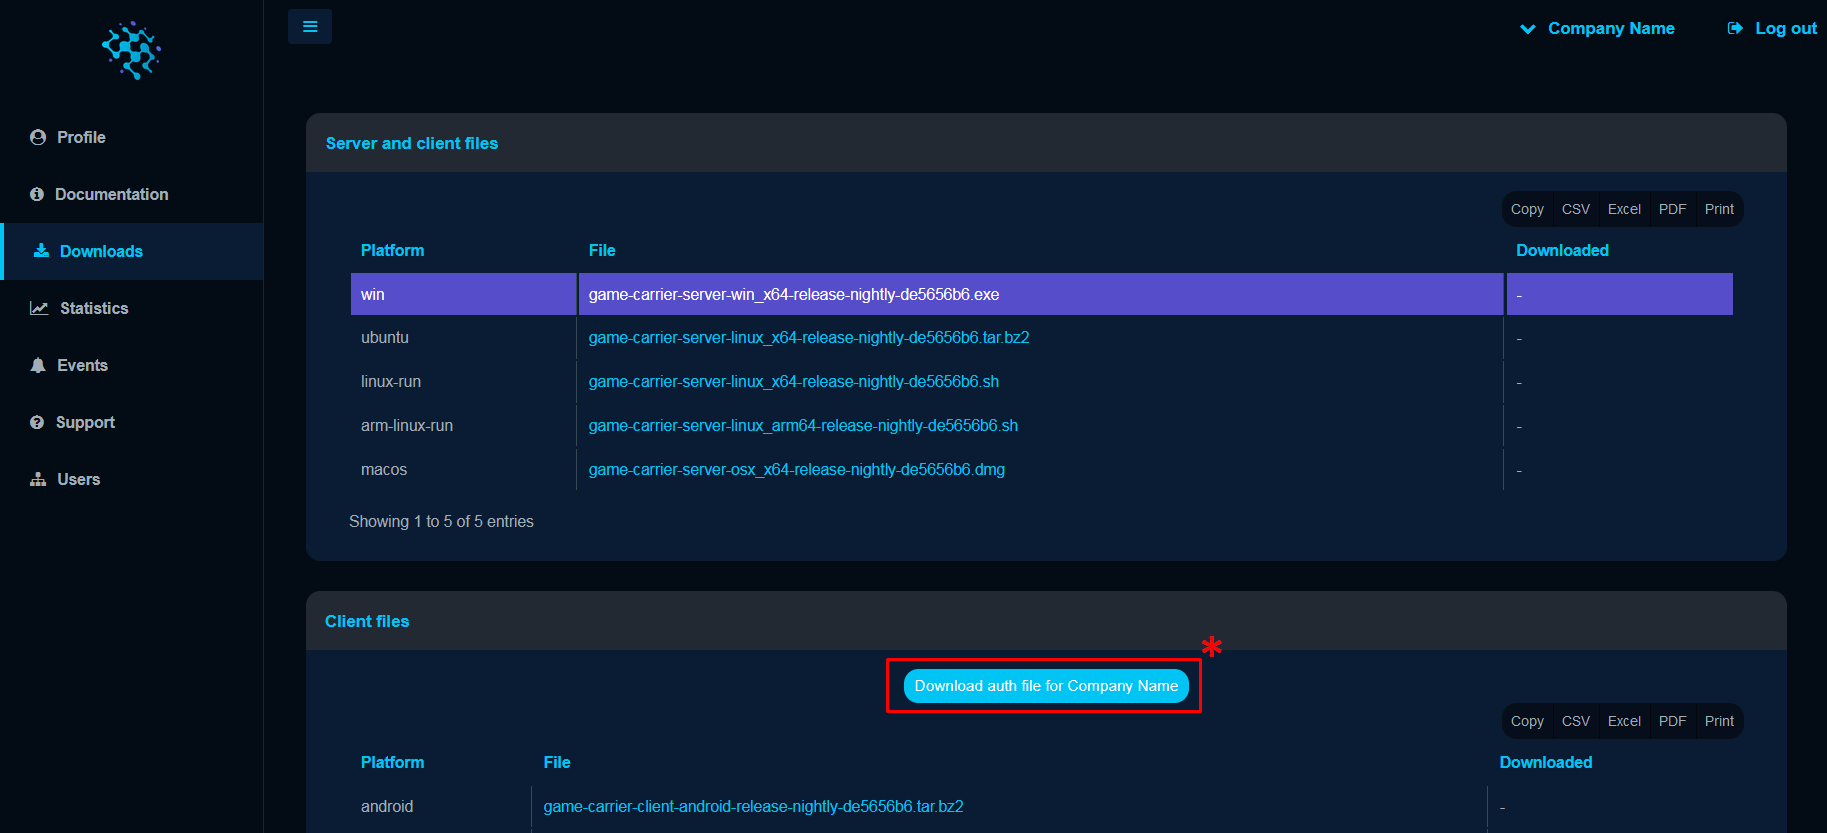
- Additionally, you have to download the license file
authentication.datby clicking theDownload auth file for...button in the Download section of the dashboard.
Once downloaded, move this file to the .gc folder in the user home directory:
-
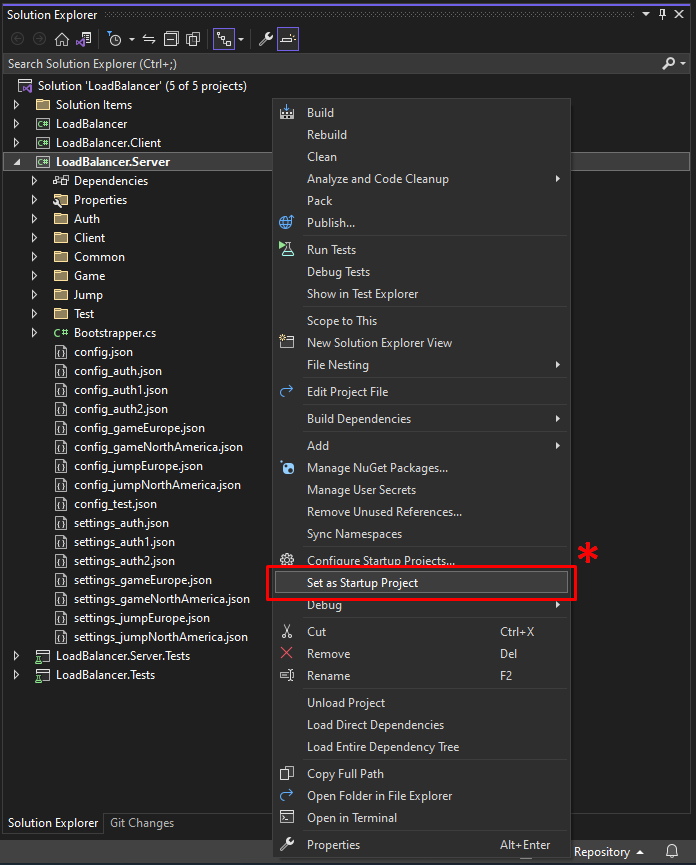
Open the Load Balancer solution in the Visual Studio 2022. The solution is located in the cloned repository
/lb/src/LoadBalancer.sln. -
Set the
LoadBalancer.Serveras the Startup Project.
At this point you can run the Load Balancer server to conduct further experiments.
Running Unit Tests
To make sure that all underlying functionality works properly you can run a few unit tests.
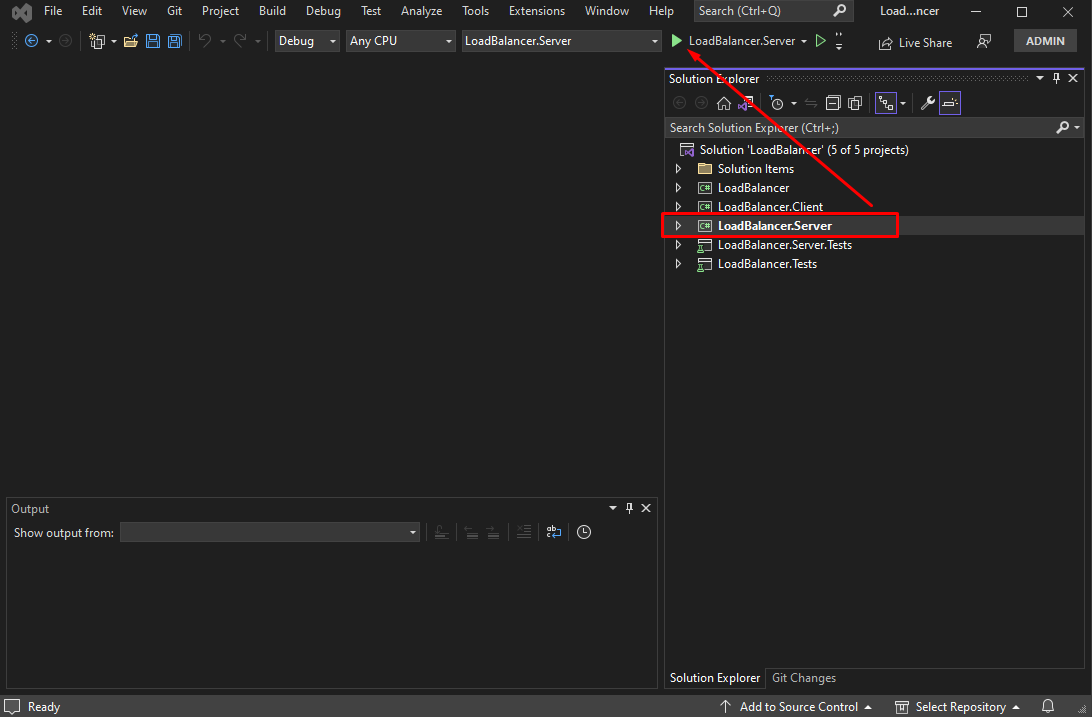
Run the Load Balancer server by selecting the LoadBalancer.Server from the Search Solutions Explorer and clicking the Run button.
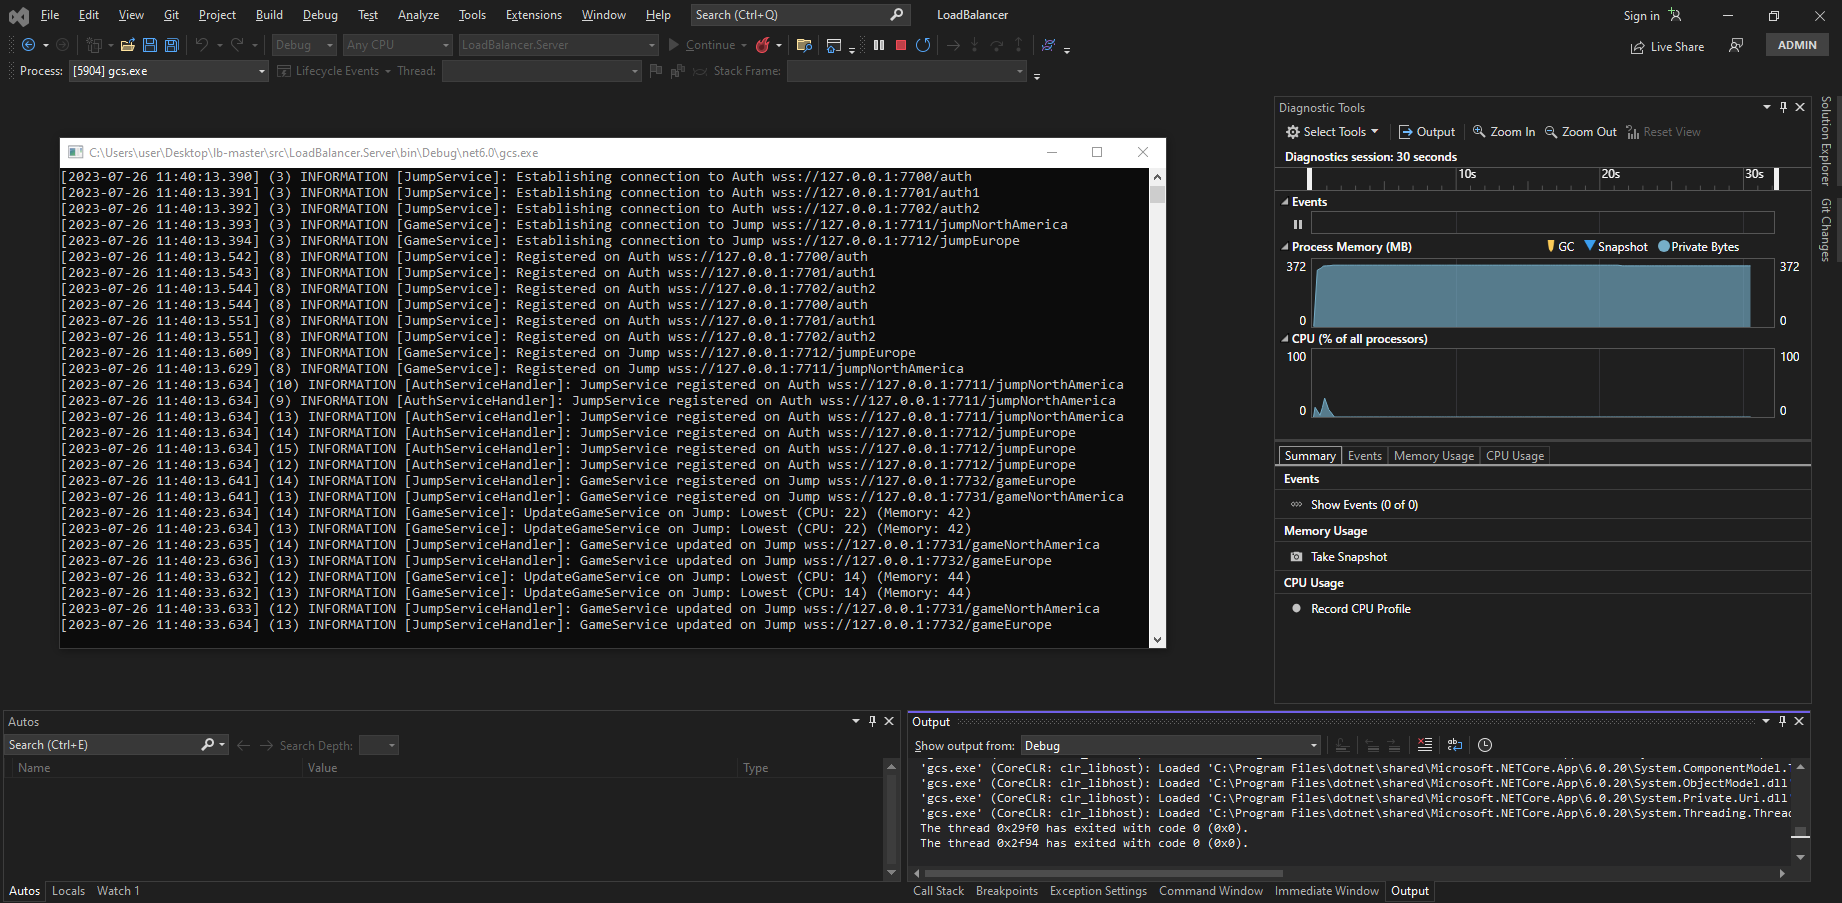
The correct execution of the LoadBalancer.Server will open a separate terminal window for logging purposes.
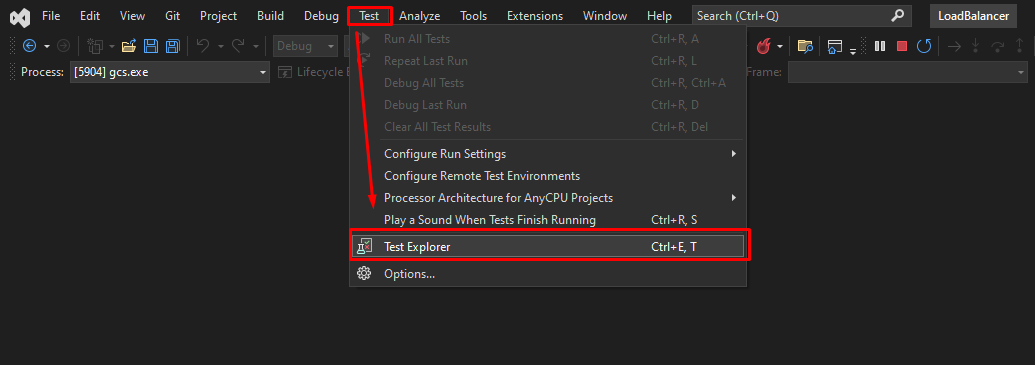
Open Test Explorer by clicking the Test dropdown menu and selecting the Test Explorer from the list.
Either run All Tests or select a specific test from the list and run it.

Running Unity Example
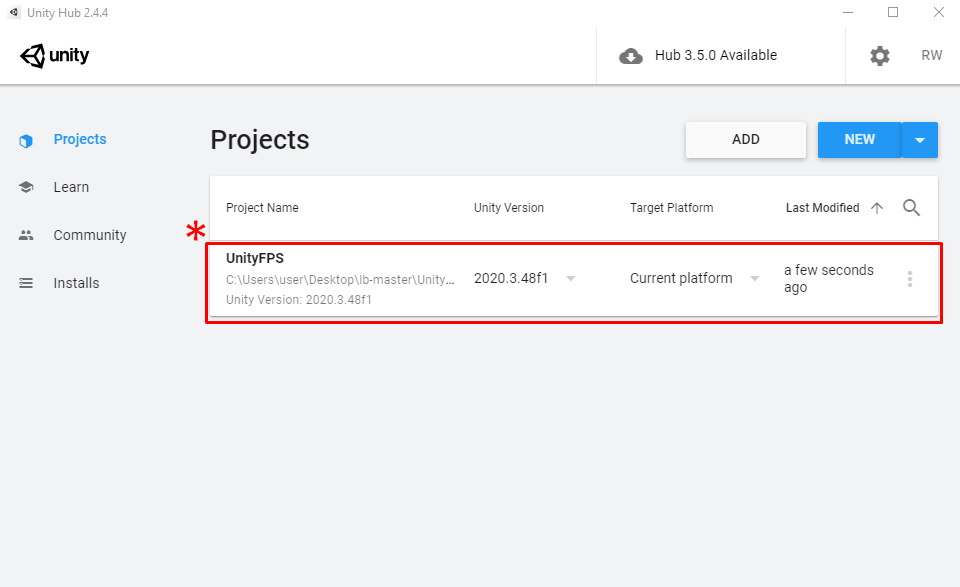
This section implies that you have Unity Hub installed with the Unity version 2020.3.48f1.
The UnityFPS example allows showcasing the process of a client interacting with the Load Balancer to connect to the game, this process involves the following steps:
- Connecting to the Authentication Server.
- Obtaining the authentication token.
- Retrieving the list of Jump Servers from the Authentication Server. The list contains the IP addresses and ports of Jump Servers.
- The client selects the Jump Server that has the lowest latency.
- The client connects to the Jump Server.
- The Jump Server verifies the authentication token.
- The client requests the Jump Server to provide a list containing the IP addresses and ports of the Game Servers.
- The client connects to the Game Server.
- The Game Server verifies the authentication token.
- The scene and other details get loaded.
To run the UnityFPS example you have to go through a set of required steps:
Run the Load Balancer server by selecting the LoadBalancer.Server from the Search Solutions Explorer and clicking the Run button.
The correct execution of the LoadBalancer.Server will open a separate terminal window for logging purposes.
Run the script CopyClientToUnityFPS.cmd to copy all necessary files to Unity. The script is located in the cloned repository \lb\src\cmd\CopyClientToUnityFPS.cmd.
Once the script is executed, run the Unity Hub where you will find the newly added UnityFPS project. Click it to run the project.
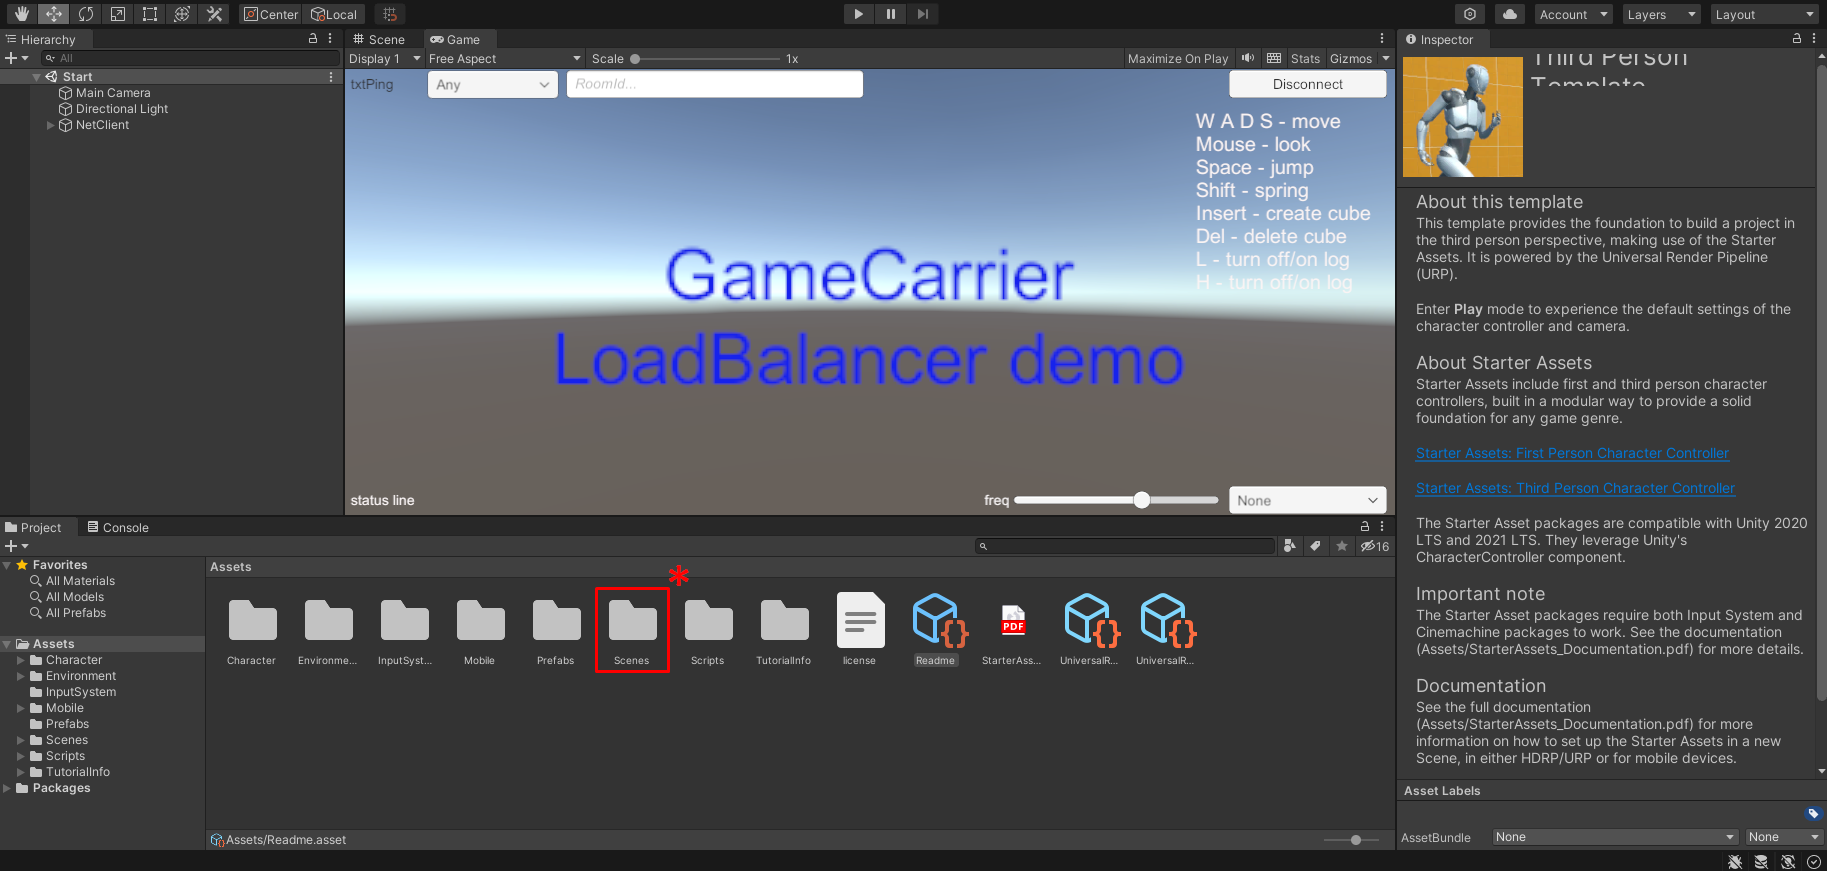
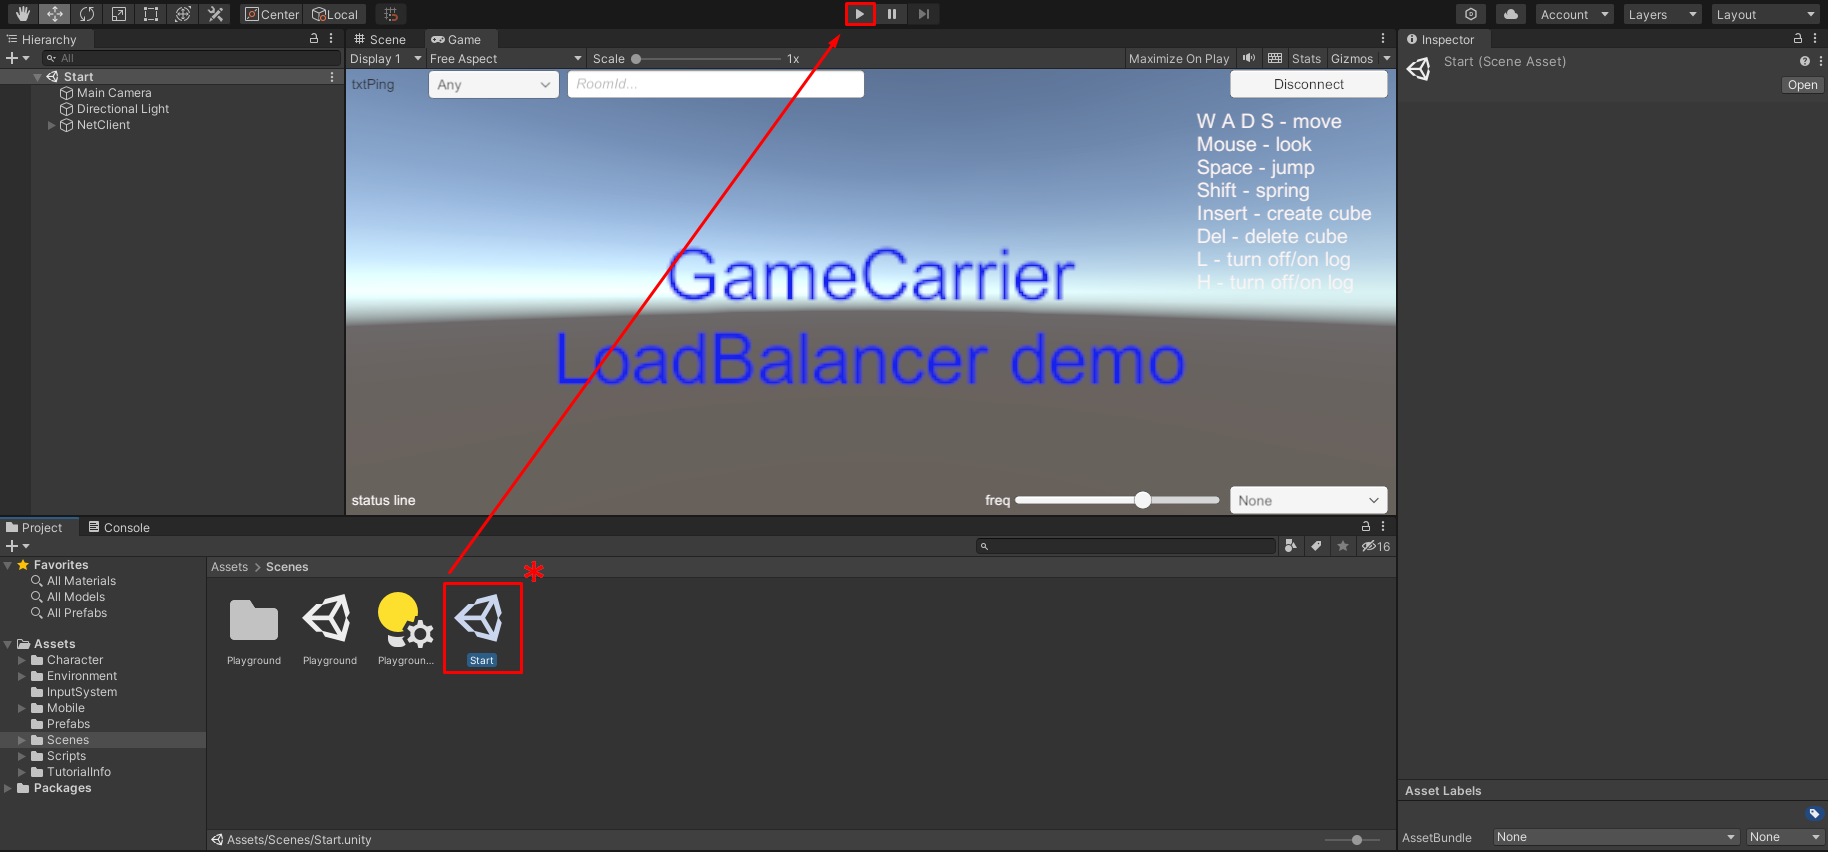
In the UnityFPS project open the Scenes folder.
In the folder select the Start.unity file and run the scene.
Click the Join Room button in scene Display:
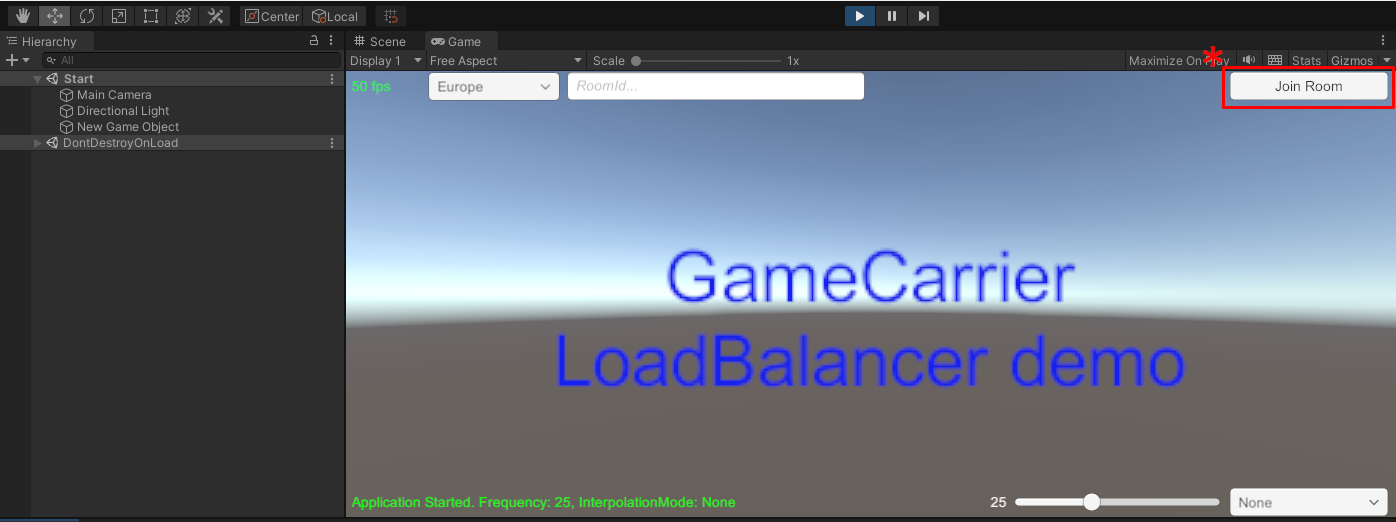
By clicking this button, you instruct the client to perform all steps requierd for a client to connect to a game server through the Load Balancer. This process is described in the beggining of this section.
The correct execution of the client logic will run the following scene, while outputting the connection history:
